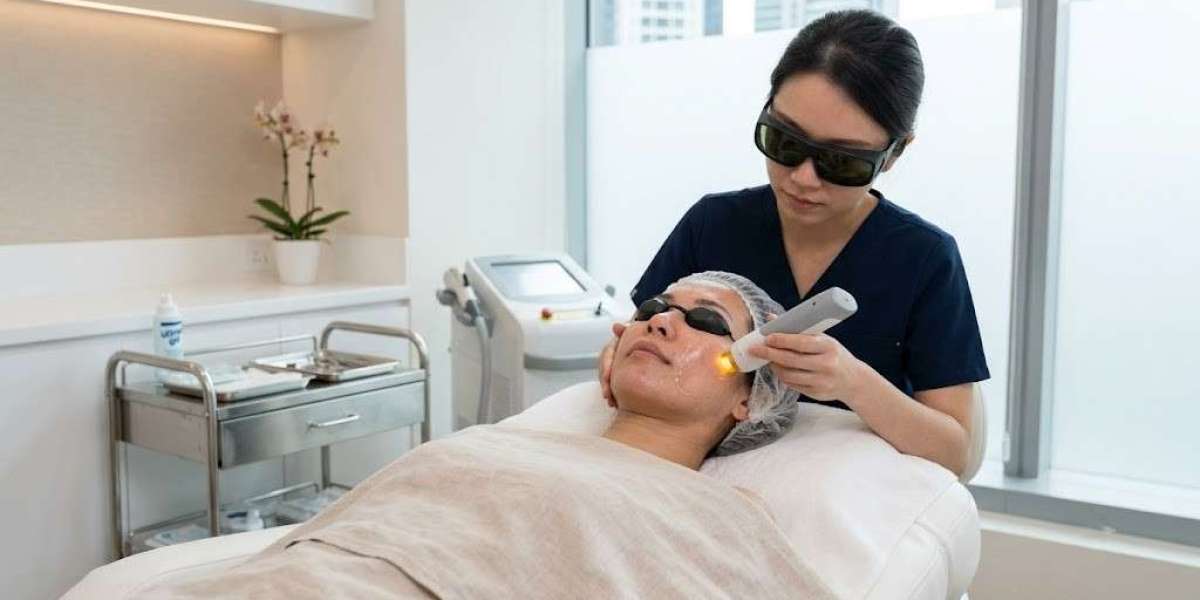

The anticipation surrounding a first-time skin procedure often outweighs the procedure itself. Concerns about discomfort, potential side effects, and the overall clinical experience occupy your thoughts in the days leading up to the visit. These worries are particularly common when you have never been inside an aesthetic clinic for a light-based treatment. This guide provides a thorough, honest preview of what each stage involves — so you can arrive informed rather than anxious.
Why This Wavelength Is Chosen
Every light-based dermatological tool operates on the same foundational concept: certain molecules absorb certain wavelengths of light more readily than others. The machine used in this therapy emits a focused beam at approximately 577 nanometers, which aligns precisely with the absorption spectrum of hemoglobin. This is the iron-containing protein packed inside red blood cells, and it is the primary target of the entire procedure.
When the beam reaches a superficial blood vessel, hemoglobin absorbs the photons almost immediately. That absorbed energy converts to heat, and the resulting temperature spike damages the vessel's inner lining. The wall weakens, constricts, and eventually seals shut. Because the absorbing molecules are concentrated almost entirely within vascular tissue, nearby structures such as collagen bundles, nerves, and glands remain untouched.
Your body then begins the slow work of clearing the debris. White blood cells engulf the remnants of the sealed vessels and transport them through the lymphatic system for disposal. This cleanup takes roughly four to eight weeks, which explains why the visible payoff does not arrive on the same day as the appointment.
The narrow focus of this wavelength makes it especially effective for vascular conditions. Persistent redness, dilated facial capillaries, rosacea, and port-wine marks are all well suited to this approach. Pigmented lesions like sun spots can also be treated to a degree, since melanin absorbs light at nearby wavelengths. This versatility is one reason the yellow laser treatment has earned a prominent place in modern dermatology.
Preparing Your Skin in the Weeks Prior
The single most critical preparatory step is limiting sun exposure. Starting at least two to three weeks before the scheduled date, apply broad-spectrum sunscreen daily and seek shade whenever possible. Ultraviolet light triggers fresh melanin synthesis in the upper epidermis, and that melanin can intercept the laser energy before it reaches the vascular targets underneath.
Tanned skin therefore presents a double-edged problem. The beam scatters in the surface layer instead of penetrating to the correct depth, which reduces how well the session works. At the same time, the epidermis absorbs enough stray energy to cause burns, blistering, or patches of darkened pigment that take months to resolve.
Your topical routine needs simplifying as well. Retinol, glycolic acid, salicylic acid, benzoyl peroxide, and abrasive scrubs should all be paused at least one week before the visit. These formulations accelerate cell turnover and thin the outermost barrier, leaving the skin far more reactive when the energy is delivered.
Ingestible factors also warrant attention. Aspirin, ibuprofen, fish oil, and concentrated vitamin E all have anticoagulant properties that increase the risk of bruising and pinpoint bleeding. Set them aside several days before the appointment when your physician confirms it is safe to do so. Alcohol should be avoided the night before as well, since it dilates blood vessels and can magnify swelling in the hours following the session.
On the morning of the visit, wash your face with a mild cleanser and leave it bare. No moisturizer, no primer, no cosmetics. If you have a history of herpes simplex outbreaks, inform your provider well in advance so preventive antiviral medication can be started. Adequate hydration also matters — well-moisturized skin cells distribute light energy more evenly during the procedure.
The Consultation: Mapping Your Skin
Upon arrival, the clinical team begins with a structured assessment. A nurse or physician examines your complexion under a magnifying light, cataloguing the distribution of visible capillaries, pigment clusters, and any regions of active inflammation.
You will be asked to disclose your complete medical history. Every prescription, over-the-counter drug, and herbal supplement matters. Certain antibiotics in the tetracycline family, for instance, dramatically elevate photosensitivity and may require the appointment to be postponed.
During this conversation, the practitioner explains what the yellow laser treatment can realistically achieve for your skin and where its boundaries lie. They will outline the expected number of sessions. Vascular conditions almost always demand a series of treatments because each application only partially occludes the targeted vessels.
Standardized clinical photographs captured at this stage serve as an objective reference point for tracking progress over time. Subtle improvements that escape casual observation become clearly visible when before-and-after images are placed side by side. Once the proposed strategy is reviewed and consent documentation signed, you are guided into the treatment room.
What Happens During the Procedure
You will lie back on a padded table while the room lights are lowered. The treatment zone receives one final cleansing to eliminate any residual surface film. Protective eyewear is fitted over your eyes before any device is powered on — the concentrated output poses a genuine risk to unprotected retinal tissue.
A transparent coupling gel is spread across the skin. This layer allows the handpiece to glide smoothly and helps conduct excess heat away from the epidermis. Some machines feature a built-in cooling tip that supplements the gel's protective function.
The operator typically begins with a single test pulse on an inconspicuous area, perhaps along the lower neck or ear. This quick trial confirms the energy calibration suits your complexion and tolerance level. Once the response is appropriate, the technician continues through the full treatment zone in systematic, overlapping passes.
Most people describe the feeling as a sharp, momentary snap — similar to a rubber band being flicked against the skin. The discomfort is brief and manageable. You will hear a rapid clicking noise with each pulse, and a faint smell of singed hair may be detectable if fine vellus hair lies within the treatment field.
A typical session runs between fifteen and thirty minutes, depending on the number of areas being addressed. You remain fully conscious and are encouraged to communicate with the operator throughout. If the intensity becomes uncomfortable, the settings can be modified instantly.
Post-Procedure Recovery
When the gel is removed and the device is powered down, your complexion will appear pink and feel warm. This inflammatory response is entirely expected and generally resolves within a few hours. The staff at your aesthetic clinic will apply a calming cream and broad-spectrum sunscreen before you leave the room.
Back home, cool compresses offer the most immediate comfort. Wrap an ice pack in a clean towel and hold it gently against flushed areas for short, repeated intervals. Never apply bare ice directly to the face — extreme cold on sensitized skin can cause additional damage rather than relief.
Keep water temperatures moderate and avoid heat-intense environments for the first forty-eight hours. Saunas, steam rooms, heated pools, and vigorous exercise all elevate skin surface temperature and can prolong the period of visible redness. Lukewarm showers are perfectly fine during this initial healing window.
Around the second or third day, light flaking or dryness may develop across the treated regions. This is your skin naturally shedding cells that were thermally compromised during the session. Keep the area well moisturized and allow the peeling to occur on its own. Forcing loose flakes off prematurely can leave raw spots that are slow to heal and prone to discoloration.
Sun protection remains critical for a minimum of one to two weeks after the procedure. Freshly treated skin is especially vulnerable to UV-induced pigmentation changes. Use broad-spectrum SPF 30 or higher and reapply frequently, even during brief outdoor errands. Simplify your daily routine to a gentle cleanser and basic moisturizer while the barrier heals. Retinoids, exfoliating acids, and concentrated vitamin C should all remain on hold until recovery is complete.
Vessels that were directly targeted may initially appear darker or take on a bruised purple tint before gradually fading. This darkening is a normal transitional phase and resolves as the body reabsorbs the compromised tissue.
Final Thoughts
Walking into a clinical setting equipped with detailed knowledge transforms the entire experience. This type of light-based session is brief, requires no anesthesia, and involves minimal disruption to everyday life. You arrive, undergo the procedure, and return to your routine the same day.
The three pillars of a smooth experience are straightforward. Prepare your skin diligently beforehand, trust the clinical team's guidance during the session, and commit to the aftercare protocol once you are home. With those elements in place, your first appointment sets a reliable baseline for evaluating results and planning any future treatments you may pursue.